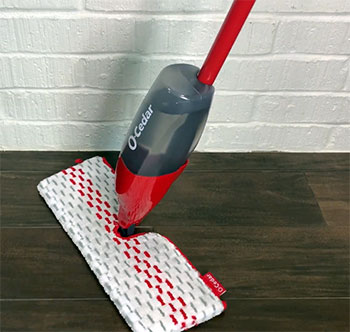
It’s is a pretty disappointing issue to ever encounter when your O-Cedar spray mop leaking water, right? You might be a new or old user who is suddenly facing a leaking water issue with your O-Cedar mop — the disappointment is pretty much same.
However, anyone who is looking for a lightweight, functional, and cheap spray mop, can have hands on it. Though this is a very lightweight mop, its plastic construction is durable.
This is ultimately a spray mop that every homeowner loves to have. But still, everything in this world doesn’t come alone. It comes to a problem that most of the homeowner has a complaint about.
What’s that?
Leaking water is the problem that you can experience with it along with a sudden breakage into it.
Why Is My Spray Mop Leaking?

The reason to get a spray mop is obvious that you want to clean your bathroom or home.
But while it’s creating leakage of water mixed with cleaning solution won’t clean home rather it will just make everything around messier.
Once you are facing this issue, you need to stop using the mop. And find out why the leakage is occurring.
So, if you’re trying to figure out why is my o-cedar spray mop leaking water, then let’s get to know the details.
- Missing Rubber Tip
The rubber tip is hardly noticeable. Or we barely give importance to it.
Sometimes, due to pressure rubber tip can be broken or fall off and lost somewhere. And you never noticed it. And you start facing leakage whenever you’re using it.
This is annoying when you start facing a leakage issue and you don’t know the real cause. Next time you’re encountering this issue, first check if the rubber tip is there or not.
- Loosened Black Cone
The black cone in this spray mop plays a very vital role to clean. It keeps the spray mop adjustable in every position.
But it gets to loosen up easily also. If it gets loosened from its place, you might face water leakage terribly.
- Clogged Spray Nozzle
Mineral deposits from tap water or dried cleaning solution can clog the tiny spray openings. This prevents the nozzle from misting properly, pushing fluid around the head instead.
- Stuck Check Valve
A small check valve inside the spray head controls fluid flow. If stuck open, it will leak solution even when not spraying.
- Worn Out Gaskets/Seals
The gaskets and seals around the nozzles and bottle cap wear out over time. This allows fluid to seep through minor cracks.
- Loose Hose Connection
If the hose attaching the spray head to the bottle isn’t firmly secured, leakage can occur from the loose fitting.
- Damaged Bottle Cap
Cracks or stripping in the threads of the bottle cap prevent it from sealing tightly, allowing leaks around the rim.
- Overfilled Solution Tank
Overfilling the fluid reservoir can cause overflow around the bottle cap or backing up into the spray head.
- Damaged O Ring
Since there is a built-in O ring that genuinely works to prevent any kind of leakage. But this is very hard to keep it safe while you need to push it back with high pressure.
And the wrong pressure can damage the O ring. Sometimes this ring can be broken too.
Since the push button’s work is controlling refill, if the O ring gets damaged, you can encounter leakage.
So, next time you’re seeing water leakage into the water, make sure you’re checking the O ring.
How To Fix A Leaking O-Cedar Spray Mop?
As you know some of the possible causes that can be responsible for O-Cedar spray mop water leaking. You can try to resolve these issues. And see if the problem is still persistent.
While you really can’t solve it by yourself, knock the customer service of O-Cedar. They are trying to solve your issue if you reach to them.
With so many ways an O-Cedar spray mop can leak, some trial and error may be needed to pinpoint the exact problem. But you can use this step-by-step troubleshooting guide to methodically diagnose and fix leakage issues:
Step 1: Check the Nozzle
Remove the spray nozzle head and inspect it for any blockages in the misting holes. Soak it in white vinegar or scrub gently with a toothpick to remove mineral deposits. Rinse thoroughly in hot water.
Step 2: Clean Bottle Cap & Gaskets
Disassemble the bottle cap and clean it thoroughly with hot water and mild detergent. Check all gaskets and seals for wear or damage and replace if needed.
Step 3: Tighten Hose & Cap
Check that the hose connecting the spray head to the bottle is pushed completely into the cap. Tighten securely. Also ensure the bottle cap is threaded tightly onto the reservoir after refilling.
Step 4: Fix Check Valve
Disassemble the spray head and use a pin or needle to ensure the check valve moves freely up and down. Rinse the head and reassemble.
Step 5: Refill Properly
Never overfill the fluid reservoir – leave 1-2 inches of headspace for expansion. Check for leaks after refilling bottle.
Step 6: Test Spray Operation
Reattach spray head and test misting on a towel to ensure it works properly before mopping floors. Targeted misting means the system components are secure.
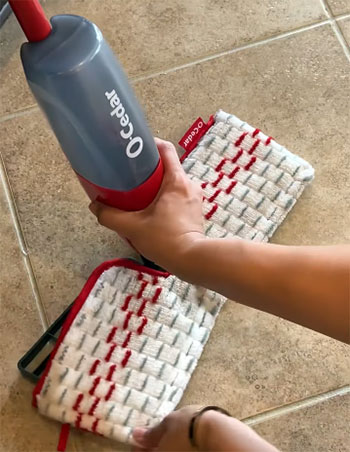
Disassembling an O-Cedar Spray Mop
To fully diagnose and repair a leaky O-Cedar spray mop, you’ll need to take it apart for inspection and cleaning. Follow these steps:
Remove Spray Nozzle
Twist the spray nozzle counter-clockwise to unscrew it from the head swivel joint. This allows access to the tiny nozzle holes for cleaning.
Detach Hose
The hose connecting the spray head to the bottle has a quick disconnect fitting. Pull down on the plastic collar while gently tugging on the hose to detach it from the cap.
Unthread Bottle Cap
Unscrew the threaded bottle cap to reveal the check valve and seal inside. This also allows you to remove the bottle for cleaning.
Disassemble Spray Head
Small Phillips head screws allow the two halves of the spray head to be separated to access the internal check valve parts for inspection and cleaning.
Always take pictures during disassembly to aid correct reassembly. And consult manufacturer guides for your specific model. Thorough cleaning and repair of components will have your O-Cedar spray mop working like new again.
Fixing a Leaky Mop Head
If you’ve isolated the source of spraying to around the mop head, try these solutions:
- Check for debris trapped under the head gasket.
- Make sure the head is twisted on completely straight and tight.
- Look for cracks in the plastic head or worn out gaskets.
- Remove head and spray soapy water around connection point to detect leaks.
- Consider replacing the mop head if it’s highly worn or damaged.
Properly securing the mop head and replacing worn gaskets should resolve any leakage occurring around the bottom of the unit.
Is O-Cedar Worthy?
Apart from a minor issue, this spray mop has never let down its users. If you are a new user, then look through our discussed benefits and usage.
- Cleans Larger Area
So, you have a big room to clean and the mop that you’ve been using all your life is small. You are spending much time mopping then.
This is a wider mop that can clean a larger area at once.
It’s high time to ditch your old small mop now and get this 16″ longer-headed mop. It picks up all the dirt that comes in its way. For cleaning the kitchen, rooms, washroom, or stairs, this can be an ideal choice.
Your cleaning job will never be so easy without it.
- Flexible to Use
The mops are removable. You can remove them, wash them the way you want – manually or in the washing machine. Extra expenses of multiple mops won’t give a budget headache.
Many other renowned mops don’t even give this flexibility of reusable mops. You need to refill mops with them.
But it’s just the same old-fashioned thing to let you use the same mop again and again.
You can even use your cleaning solution. It uses a very minimal solution but cleans more than it uses. It’s also a plus point for many users.
If you want to clean all the home with a very minimum amount of cleaning solution, you can do that without any hesitation.
- Mechanism
When you get this mop delivered into your hand, it comes completely assembled. You don’t need to follow additional assembly steps.
You can just hit the floor directly with it once you received it.
It doesn’t need a bucket to use. And it includes a built-in spray bottle. There are most of us can’t think of mopping without a bucket.
Moreover, O-Cedar has also made that possible to experience mopping without dragging a bucket with it.
There is another reason that makes it more attractive. The mop rotates itself. In this way, you can clean more accurately. It takes very little time.
Its pad can flip also. You can use both sides of the pad. However, it’s an excellent thing to let you use the same pad for the whole cleaning process by flipping the pad’s side only.
The mop is plastic made. But the manufacturer didn’t leave any reason behind to make it sturdy. This is highly durable and a perfect fit for long-term use.
- User Friendly
Doesn’t want to use the double mop for dry and wet cleaning? No need to get a broom if you got O-Cedar Spray mop.
You can use it dry for dusting. Else, for mopping, you can opt for a wet clean.
Spray bottle adjustment is easier like cutting butter with a hot knife. The one-touch release system makes the spray bottle easy to remove and adjust.
There is also no accidental excessive issue that will appear with it. You can control the amount of spray following the flexible and comfortable grip that comes with it. This grip is easily accessible without any power source.
Frequently Asked Questions (FAQ)
Since it doesn’t come with a limited cleaner solution, you can use a commercial or homemade cleaning solution. The most recommended cleaning solution is vinegar mixed with water. Else, you can also use any commercial solution according to your floor type.
Definitely, you can use this on any kind of floor.
No, the manufacturer has highly discouraged adding bleach or wax with this mop.
Though the mopping pad is made of super quality microfiber, you need to change it after 100 cycles of usage. So, after every 3 months around try to replace the mopping pad if you’re daily using this for mopping otherwise count to 100 cycles of usage to replace.
Common reasons an O-Cedar spray mop leaks include clogged nozzles, damaged gaskets, loose hose connections, stuck check valves, overfilled solution tanks, and cracked bottle caps.
To take apart an O-Cedar spray mop, detach the spray nozzle, disconnect the hose from bottle cap, unscrew bottle cap, and use Phillips head screws to separate the two halves of the spray head for internal access.
Final Words
From the O-Cedar spray mop leaking problem to fixing ways and usage, we’ve discussed everything. We hope you can fix the water leaking issue or any issue that comes around.
One thought on “O-Cedar Spray Mop Leaking: Reasons And Troubleshooting Tips”
Leave a Reply
Recent Posts
Olivier Midy Face Oil Reviews From My Experience: Is It Worth It?
You deserve skincare that nourishes and revitalizes your complexion with natural ingredients. Olivier Midy face oil stands out with its blend of botanical extracts and promise of glowing...
Round Lab Dokdo Cleanser Review From My Experience: Is It Worth It?
Selecting a safe, effective facial cleanser requires evaluating skin barrier compatibility, surfactant stability, and pH optimization.You need a dependable face wash that lifts impurities cleanly...
It would be helpful to show photos of the rubber tip, black cone, and o ring. And how to order replacement parts.
This is like telling someone that they are sick but not saying what’s wrong or what to do about it.