It is frustrating when the tub surround adhesive won’t stick its grip during installation. A common problem with many of the different types of adhesive tub surround products on the market is that they are not designed to stay stuck.
But rather to provide an additional layer for support. Cleaning using chemical cleaners or solvents instead of just water will also cause problems with adhesiveness.
Other times, there is not enough dry time following the application before the application to do its job. This is why it is important to use mastic or silicon adhesive for this type of project.
Reasons Why Tub Surround Adhesive Isn’t Stick
If your adhesive tub surround won’t stay stuck, there are a few possible reasons that could be contributing.
If the adhesive isn’t strong enough, it may not be able to hold the tiles in place during installation.
If any of the ingredients used in the adhesive is water-soluble (such as glycerin), then this liquid will seep through gaps and cause the adhesive to come loose over time.
Let’s see some problems that why Tub Surround Adhesive Won’t Stick-
- Not Using A Strong Adhesive
Oftentimes, those looking to install tub surround tiles will opt for an adhesive that is not as strong as they would like it to be.
In this case, the adhesive may only be able to provide additional support and may not be able to hold the tiles in place during installation.
- Using Water-Soluble Adhesives
While some types of tub surround adhesive are water-soluble, it is important to note that they seep through gaps in the tile during application and bond to walls.
The edges of your tiles can become loose over time due to this.
- Using a Type C Tub Surround Adhesive
This type of tub surround adhesive has been specifically developed for use on cast iron and ceramic surfaces, but highly water-soluble materials used during their production may cause problems with them bonding within a veneer surface such as ceramic tile.
- Failure To Clean The Tub Surround Adhesive Correctly
Note that your projects can be sped up significantly by properly preparing and cleaning ceramic tub surrounds in advance of your project start date!
It is advised you dress fully protective clothing (those wearing gloves will help), as well as a mask, before attempting this process on large or fragile surfaces such as some shower stall areas, etc.
That will save you from a lot of trouble!
- Install Tub Surround Tile As You Are Finished With The Room
Those that have already completed the room will oftentimes forget to clean the adhesive away from their tile after installation.
This type of mistake may cause this extra reinforcement to fail over time, especially in cold weather climates and where there are a number of people using the bathtub over time because it allows for moisture collecting under these tiles.
Note too, that floor glues used within your tub surround area can also be an issue, as well.
- Installing Luxury Tile If The Initial Expense Is Not Worth It
For instance, in some situations especially of tile systems installed manner from high-pressure spray with adhesives left on for longer periods than recommended.
There will be small gaps or loose tiles around tub/shower wall connections which may need fixing at a later date due away from spending lots of money on a quick fix.
Here’s an example of such a sudden installation where after six months of normal care, the bathroom looks neglected but not terrible!
It seems to be due to still leaving very large gaps for moisture to create and travel between tiles that may be clogged up with wax residue/wax sealant and debris from the shower area (if done without doing any deep cleaning!)
How To Fix Tub Surround Adhesive That Won’t Stick?
In most instances, a lot of the time is likely caused by tile adhesive left on for just too long.
Hard water and wax residue can build up over time which is a major reason why tub surround tiles will not stick well in the first place to start within this very case.
Adhesive problems are normally solved by making sure all old sealant has been removed from around your tub surrounds.
See more on this in the below section on how to fix why the tub surrounding adhesive is not stuck.
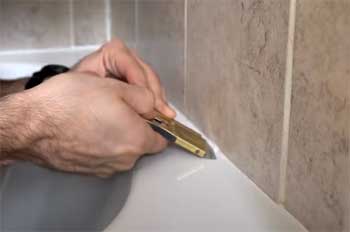
- Remove The Old Adhesive And Any Debris
If there are large chunks of adhesive, you’ll need to use a scraper or knife to remove them before starting the new adhesive. You can also try using a vacuum cleaner with the hose attachment to clean up the area if necessary.
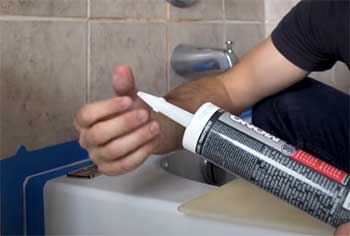
- Apply A Thin Layer Of New Adhesive
Start by using your hands or an applicator gun to apply a thin layer of adhesive directly onto the surface of the tiles. Once it sets you can use a roller or brush to smooth out any bubbles, look for mismatched seams, and so on.
- Use The Proper Amount Of Adhesive
Once you’re happy with the initial application, continue by using a clean applicator tip/dip tube to get uniform coverage across all areas where needed (if desired).
- Allow Air In Cracks Between Tile Slabs/Etc.
Once the adhesive is completely cured, you can now work to ensure that it’s properly adhered to between tiles.
For example, I was moving around and testing one tile at a time so I could find any cracks or spaces where moisture may be getting through after setting the slab.
- Clean With Mild Cleanser + Warm Water
First, cleanse all previously treated areas of a smooth-smooth surface by dampening slightly (not soaked) with water and wiping down.
This will help to remove any residue or wax build-up that may have been left behind, as well as introduce a lot of oxygen/air into the cracks between tiles to induce faster adhesive cures here too!
- Allow Pointed Cure Allowing 24hrs Before Repotting
With most adhesives that you apply on smooth surfaces, no-brainer fact remains obvious: air is bad. Wrap up waxed wood or similar with foil to limit exposure to moisture.
Apply a potting mix of your choice which is not too heavy so as to avoid crushing and sinking through the pan. But rather light enough for it shrinks back in place when you repott.
Keep this cake topped off by fitting drains under each hole.
Frequently Asked Questions (FAQ)
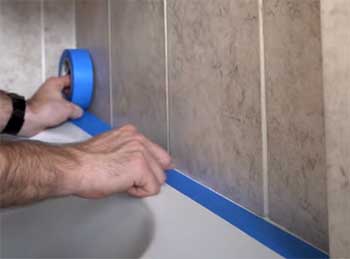
On many occasions, it is asked that type of glue should be used. When looking at the list below all three problems in building a steam shower can easily be solved with proper selection of appropriate tub surround material and on certain cases (such as tape) sealant must also add before you assemble them.
Cleaning out and flat sanding the surface before applying any glues is extremely important to remove all traces of silicone as it can compromise adhesion power eventually.
The best lamination adhesive available is Epon, based on acrylic which even self-catches water, and thus after using it once only you do not have to clean the surround up too often. In some cases, glues fail completely.
Conclusion
Tub surround adhesive won’t stick if the tub is too dry or if there is too much humidity in the air. If you are having trouble with your tub surround adhesive not sticking, try using a hair blow dryer to remove any excess moisture.
To avoid the problem of tub surround adhesive won’t stick in the future, keep your bathroom well-ventilated, and don’t use it as a humidifier by running the shower at the same time.
Recent Posts
Olivier Midy Face Oil Reviews From My Experience: Is It Worth It?
You deserve skincare that nourishes and revitalizes your complexion with natural ingredients. Olivier Midy face oil stands out with its blend of botanical extracts and promise of glowing...
Round Lab Dokdo Cleanser Review From My Experience: Is It Worth It?
Selecting a safe, effective facial cleanser requires evaluating skin barrier compatibility, surfactant stability, and pH optimization.You need a dependable face wash that lifts impurities cleanly...