Imagine waking up in the middle of the night because the water keeps dripping. That’s annoying enough, but it is worse if it comes from your shut-off valve. You have a dripping issue and the stress of possible corrosion to top it off.
Shut-off valves usually leak from the thread and there can be multiple reasons behind it. Loose closings, tape issues, mineral buildup, and corrosion are the major reasons why it happens.
Fortunately, there are ways to fix this problem. If you’re dealing with a leaky shut-off valve, here is how you can fix it.
Reasons Why Shut-Off Valves Leak Water
There can be multiple reasons why your shut-off valve is leaking at the thread. It can be anything from a loosened knob to corrosion. Here are the possible reasons why your shut-off valve is leaking around the thread.
- Unclosed Knob
This is the most common reason why newer shut-off valves leak especially if they’re gate valves. Very simple problem and this is the first thing you should check when your valve starts leaking.
Look at the connecting knob of your shut-off valve. It is usually screwed tightly to the thread so the water flows properly.
If the cap isn’t screwed properly, then it can be the reason why the water is leaking out of the joint.
- Bad Threading Joint
The shut-off valve has to be connected firmly to the water outlet pipe to create an airtight seal. This prevents water from dripping.
If the connection near the thread is loose or has gaps around the threading, you’ll have a whole dripping mess in your hand even after you tighten the knob.
- Corrosion
This is the most common cause of old plumbing layouts. Years of high-pressure water flow slowly wears the valves down.
The moisture helps rust take over, and the corrosion can eat away at the threaded part. This creates a gap around the point where the pipe and valve connect.
The gap caused by corrosion breaks the airtight seal and the shut-off valve starts leaking.
How To Fix A Leaky Shut-Off Valve?
Now that you know the cause, let’s focus on fixing them. In most cases, you can solve the issues with a wrench and a bit of Teflon tape. But sometimes you might need more things like pipe dope.
Here is how you can fix your shut-off valve.
- Tighten the Connecting Knob
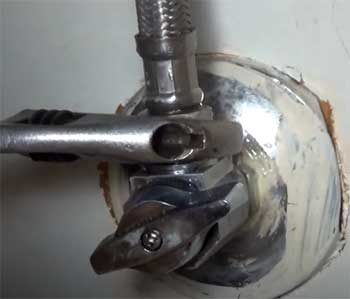
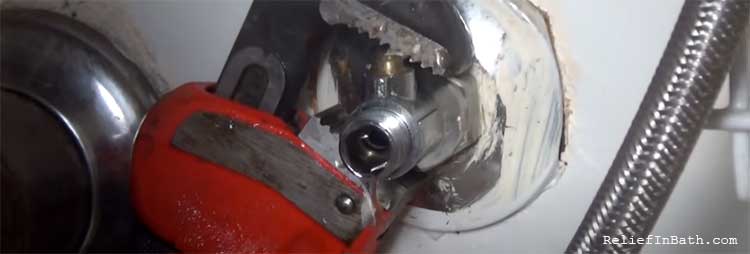
This is the first step of valve troubleshooting. Get your wrench, lock the connecting nob and turn it.
If you have a gate valve, slowly turn the knob counterclockwise.
Don’t go too fast, start by rotating it 1/4th of a circle. The dripping should stop once the knob is properly locked.
If you have a ball valve, check the top of the linear lever.
If there is a turnable cap, try screwing that tighter. If not, you can make it perpendicular and then parallel again.
If the issue was the knob, this should fix it.
- Re-assemble the Valve
If the knob tightening doesn’t work, you’ll have to dig deeper. Turn off the main water shut-off valve first.
Take the current valve out and wrap some Teflon tape around the threads. Make sure to do it in the thread’s direction, otherwise, the problem will be the same.
Prime the thread, the pipe, and the opening area of the valve. Then thread the valve back as close as you can.
If you already had Teflon wraps, add some more and try adding pipe dope on the threads.
- Replacement
If nothing from the list works, then it is unfortunately time to get rid of your valve. You can get a new shut-off valve and assemble it yourself following the rules.
Or you can get a plumber to do that for you. If you had leak issues, it is better to call an experienced plumber for this.
Shut-Off Valve: The Tale!
In simple words, a shut-off valve is a control mechanism to control the flow of liquids or gas. They are used in pretty much every scenario where a pipeline is involved.
Industrial shut-off valves are used to control the flow of chemicals and sometimes air. But the most common use of a shut-off valve is in the household water supply pipeline.
You’ll find it in lots of places but mostly near faucets, showers, and sometimes under your sink.
Other than those, your house will have a main water shut-off valve. The main valve is like the power switch of a computer. It controls the whole house’s water flow.
There are two types of shut-off valves you’ll see- gate valve and ball valve. Gate valves are more old-timey. They come with a rotating part on top of the joint. You turn the knob clockwise or counter-clockwise to control the water flow.
Ball valves are more “modern” and easier to operate. They have an all-or-nothing principle. Either the water flows regularly or it is completely blocked.
Operating these are easier too. You only have to make it perpendicular or parallel to stop and start the flow respectively. Now, if you need to install a new one, here is a complete guideline for you!
Frequently Asked Questions (FAQ)
Here are a bunch of questions people ask about leaking shut-off valves and just shut-off valves in general.
First, you need to find out why it is leaking. After that, you can tighten the connecting knob, re-assemble the threaded part tightly or replace it altogether.
This is honestly rare. Unless you’re using a big wrench or applying too much force, it is hard to over-tighten a shut-off valve.
Newer shut-off valves usually leak because of connection and assembly issues. The common causes are a loosened control knob or a messy threading connection to the water outlet pipe.
You can tighten the knob or reassemble the valve using more Teflon wraps. If both fail, you might have to replace the whole valve.
Final Verdict
Shut-off valve leaking at threads is a pretty common problem, especially for older valves. The problem usually goes away if you tighten the knob a little, but sometimes you may have to reassemble the whole thing.
If nothing works, then replacing the valve is the only solution. In that case, it is better to bring in an experienced plumber for the job.
Recent Posts
Olivier Midy Face Oil Reviews From My Experience: Is It Worth It?
You deserve skincare that nourishes and revitalizes your complexion with natural ingredients. Olivier Midy face oil stands out with its blend of botanical extracts and promise of glowing...
Round Lab Dokdo Cleanser Review From My Experience: Is It Worth It?
Selecting a safe, effective facial cleanser requires evaluating skin barrier compatibility, surfactant stability, and pH optimization.You need a dependable face wash that lifts impurities cleanly...