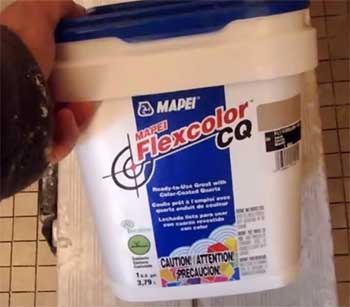
Whether installing tiles in your kitchen for the first time or remodeling your kitchen, choosing the suitable grout is crucial. One of the common choices people often encounter is the MAPEI flex color CQ grout.
Before you go ahead and choose it, you should know about the different MAPEI flex color CQ problems. Otherwise, you may face some issues that you wouldn’t have ever wanted to go through.
So, let’s get ahead and see what problems you face with this grout and how you can solve them.
Problems With MAPEI Flexcolor CQ Grout
While the grout is great for stain resistance, some problems may truly break the deal for you. Let’s get through the problems you may face with the grout one by one.
- Dries Out On The Surface But Not In Joints
One of the major concerns you will come across while using the grout is its quick dryness. Now, you may wonder, isn’t that a good thing?
Well, it may sound good, but in reality, this can be a major problem for you.
Whenever you are trying to apply the grout, you will need to be very quick with the process.
The issue you will face is that the grout will very quickly dry on the surface. However, it stays wet on the joints.
This leads to a problem of keeping up with the grouting process. It makes the whole thing much more technical and difficult for someone who is not an expert.
- The Grout Can Be Hard To Smooth Out
Many people face a big issue with this grout when they try to smooth it out. The grout tends to be a bit sandy. As a result, it can be very difficult to achieve the desired results when you start the smoothening process.
Yes, you will eventually get the job done, but reaching that point will become much harder than it needs to be.
- It Takes A Lot Of Time To Put The Grout
Keeping up with the difficulties you may face with the application of grout comes the problem of spending a lot of time behind it. I mean, you can do it quickly if you want, but the results you get that way can be pretty devastating.
If you want somewhat of a decent result from the grouting with this option, you will need to put in some time. Because of that time-consuming factor, professionals charge much more than usual for grouting.
These are some of the typical problems that you will have to face when you go for Mapei Flexcolor CQ grout. Now, let’s get through the fact of whether you can solve the issues or not.
How To Address MAPEI Flexcolor CQ Issues?
As you already got to see, the problems with the grout are pretty much in the process you use it.
So, the solution for fixing these problems is to follow the correct procedure before applying the grout to your tile.
There are several Mapei Flexcolor CQ tips that you can follow to make sure you are doing the whole thing correctly.
Let’s get through the methods that are pretty much the solutions to the problems I discussed above.
- Apply The Grout In Portions
Since the grout dries out very fast on the surface, the best thing to do is divide your whole grouting process into smaller portions.
Apply the grout in parts and finish the grouting process there first. After finishing a certain portion, you can then move on to the other parts to get the grouting done properly.
Applying grout like this helps you avoid the problem of the dried-out surface. You can easily clean up the grouting properly without going through much hassle at all.
- Follow The Proper Method
You have to be careful about applying the grout to follow the correct procedure. This grout isn’t like the ones you get to use in general.
They are a bit different and have some specific instructions to use. Typically, the manufacturer provides the necessary instructions, but they might be a bit difficult to understand.
I recommend taking expert advice or simply hiring a professional. Without the proper application method, you will have difficulty, not only in applying the grout but also after applying it.
The whole thing becomes a headache if the grout isn’t applied properly.
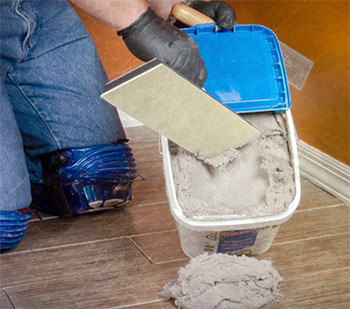
- Using The Correct Float
Now, whenever you work with the Mapei Flexcolor CQ grout, you will always need to use the medium float. You can also try out the hard float.
Try to avoid the soft-float at all costs as it won’t give you the results you want to see in your grouting.
Other than these, there is nothing much to do when it comes to grouting with the Mapei Flexcolor CQ. While it has a lot of quality and performance to offer, it also comes with some hassles that you need to be aware of.
Other Problems with Mapei Flexcolor CQ and Solutions
Efflorescence
One of the most frustrating issues with cement-based grouts like MAPEI Flexcolor CQ is efflorescence. This is a white, powdery deposit that can appear on the grout joints and tile surface.
It’s caused when water soluble salts in the grout are carried to the surface as the grout cures and dries.
Efflorescence is mainly an aesthetic issue and doesn’t compromise the integrity of the grout. However, it can be unsightly. There are a few ways to tackle efflorescence:
Acetic acid solution – Mix one part white vinegar with four parts water. Apply this solution to the affected areas with a soft bristle brush.
Let it sit for 2-3 minutes before scrubbing and rinsing. The acidic vinegar will help break down and dissolve the efflorescence.
Phosphoric acid cleaner – For more stubborn deposits, use a commercial phosphoric acid-based cleaner following label instructions. Rinse thoroughly after cleaning.
Grout haze remover – Specialty grout haze remover products are also effective at eliminating efflorescence. Apply, let sit briefly, scrub and rinse.
Sealant – Applying a penetrating grout sealer can help prevent new efflorescence by limiting moisture absorption.
Improve drainage – Address any underlying moisture issues, like leaks or poor drainage, to limit efflorescence recurrence.
Cracking
It’s not unusual for grout joints to develop minor cracks over time. Small hairline cracks are generally an aesthetic concern rather than a functional issue. However, large, deep cracks can become areas for dirt, grime and moisture to penetrate. There are several potential causes of grout cracking:
Normal expansion/contraction – As temperatures fluctuate, grout will expand and contract slightly. This periodic movement can cause thin surface cracks, especially in wider joints.
Improper installation – Grout that is too thin, not pressed into joints fully, or cured improperly is prone to cracking.
Movement/vibration – Grout in high traffic areas can crack from repeated movement and vibration. Harsh cleaning methods can also degrade grout over time.
Substrate issues – Cracks in the underlying surface, like tile or concrete, will translate to cracks in the grout.
Here are some tips for fixing cracked grout:
Sealant – Brush a flexible grout sealer into hairline cracks to provide added protection from moisture and dirt.
Grout saw – For larger cracks, use a specialized grout removal saw to open up the joint and cut out the damaged grout.
Re-grouting – Clean out cracks wider than 1/8″ and re-grout with new Flexcolor CQ. Match the original color. Let cure completely.
Caululk – For stubborn cracks in high movement areas, fill cleaned joints with flexible, paintable caulk instead of grout.
Tile replacement – Severely cracked grout with underlying substrate damage may require replacing tiles and complete re-grouting.
Grout Haze
Grout haze is a thin film of grout material left behind on the surface of tiles. It occurs when excess grout isn’t properly cleaned from the tiles during installation. The haze dries on the tile, leaving a cloudy, smeared appearance.
Grout haze can be prevented with careful grouting and through prompt, thorough cleaning. But sometimes it still occurs. Here’s how to safely remove dried grout haze:
Acidic cleaner – Specialty grout haze removers containing sulfamic or phosphoric acid are very effective. Follow product directions.
Acetic acid – Mix a solution of one part white vinegar and four parts water. Apply to affected areas and scrub with a stiff nylon brush.
Carbide grout haze remover – This grout saw attachment can mechanically remove haze without damaging tile.
Abrasive pad – For stubborn haze, use an abrasive sponge lined with a scouring agent. Test first on a small area to ensure tiles won’t scratch.
Avoid harsh acidic cleaners on polished marble or natural stone. Rinse tiles thoroughly after cleaning grout haze. Re-seal tiles and grout once done.
Algae and Mold
Excess moisture is the nemesis of all grouts. When grout gets wet and stays damp for prolonged periods, it becomes vulnerable to algae and mold growth. Bathrooms and showers are prime spots for this. It will appear as black, green or orange discoloration.
To remove grout algae and mold:
Bleach solution – Mix 3 parts water with 1 part bleach. Apply to stained areas, let sit 5-10 minutes, then scrub clean.
Vinegar solution – Equal parts white vinegar and water. Spray on and let sit briefly before scrubbing and rinsing. The acetic acid kills mold and spores.
Baking soda paste – Make a paste with baking soda and just enough water to form a spreadable consistency. Apply and let sit before scrubbing off.
Phosphoric acid cleaner – Use a specialty mold killing cleaner for stubborn growth. Rinse thoroughly afterwards.
Improve ventilation – Prevent recurrence by improving air flow and reducing humidity levels. Repair leaks promptly.
Grout sealer – Apply a mold resistant sealer to protect grout from excess moisture.
Color Fading
All grouts are susceptible to color fading over time from exposure, especially to UV light. MAPEI Flexcolor CQ formulations provide good color uniformity and fade resistance compared to standard cement grouts. But fading can still occur. Here’s how to restore color:
Grout dye – Specialty grout dyes are designed to rejuvenate color. Choose the appropriate color for your grout and follow application directions.
Whitening cleaner – For lighter grout colors, a bleaching cleaner may brighten the shade. Don’t use on darker grouts.
Acidic cleaner – Phosphoric acid cleaners will help deep clean and etch the surface for better dye absorption.
Re-sealing – Ensure grout is well sealed with a penetrating sealer to protect from future color loss.
Re-grouting – Completely removing and replacing discolored grout with new material is the most effective option. Match original color.
Holes, Pits and Low Spots
Small holes, depressions and voids can form in grout joints over time. Causes include:
- Improper installation where joints weren’t fully packed
- Loss of grout from cracking or deterioration
- Damage from pulled out debris or aggressive cleaning
- Grout settling or shrinkage as it cures
Fill small holes and pits with a thin layer of fresh Flexcolor CQ. Use a toothpick or nut pick to pack grout into voids. Strike flush when partially set.
For dents and low spots along the joint, chisel out the old grout to a uniform depth. Clean and re-pack with new grout, matching the color. Grout additives can help improve adhesion in repaired areas.
Frequently Asked Questions (FAQ)
There are some common questions that people ask about MAPEI flex color CQ. Let’s check them out along with some answers –
This depends on the type of shower you have. If you have a steam shower, then you can never use this grout for your showers. This grout isn’t waterproof, which can be a huge reason for not using them in showers.
While you can use them in a regular shower, I don’t recommend doing so. There can be several problems that you will come across when you use them in your shower.
Yes, there are quite a lot of advantages associated with the Mapei Flexcolor CQ grout. One of the best things about this grout is the stain resistance factor. The grout is very much resistant to stain, and you can easily clean the grout without any trouble.
Also, the grout comes pre-mixed in the packaging. So, you don’t have to deal with the trouble of mixing the grout before using it.
Well, yes, you can apply the grout yourself even if you have no experience doing so. But you have to make sure that you are following the proper application method.
Without the proper application, you just get troubles all around the grouting.
Typically, I wouldn’t say this is a costly method for grouting. Especially if you are doing it yourself, then it’s surely not that expensive.
However, if you are thinking of getting a professional to apply the grout, then it can get expensive. Because applying this grout can be a bit time-consuming, the labor cost can get pretty high with this one.
Flexcolor CQ takes approximately 24-48 hours to cure enough for light foot traffic. Wait a full 7 days before regular use of the tiles. Cure times depend on temperature, humidity, and thickness of grout joints.
Yes, sealing Flexcolor CQ with a penetrating grout sealer is recommended. Seal after full 7 day cure. Reapply annually. Sealer enhances stain resistance and makes cleaning easier.
Conclusion
Overall, the MAPEI Flexcolor CQ problems can sometimes be a headache, and there is no real solution. The only thing you can do is make sure you are applying the grout correctly and ensuring the best possible results.
Other than that, there is nothing else you can do to avoid the typical problems you face with it.
Also, the problems I discussed above are some common issues to face with grout. If you have a different issue, I recommend consulting with the manufacturer as that can be specific to your situation.
Recent Posts
Olivier Midy Face Oil Reviews From My Experience: Is It Worth It?
You deserve skincare that nourishes and revitalizes your complexion with natural ingredients. Olivier Midy face oil stands out with its blend of botanical extracts and promise of glowing...
Round Lab Dokdo Cleanser Review From My Experience: Is It Worth It?
Selecting a safe, effective facial cleanser requires evaluating skin barrier compatibility, surfactant stability, and pH optimization.You need a dependable face wash that lifts impurities cleanly...