In essence, a bathroom exhaust fan is probably one of the most essential parts of a home. When installed in a proper manner, it can help to eliminate steamy mirrors, fogged-up glass-made door or windows, and, lastly, rancid odor.
Furthermore, it might also aid in preventing several moisture-related issues, such as the build-ups of mildew and mold.
Due to these reasons, most people tend to install the extractor fans with light for the bathroom in their bathrooms. So, do you want to do so as well? Then, make sure to check out this thorough ‘how to wire a bathroom exhaust fan to an existing light switch’ guide right now.
Hopefully, it will be able to help you with your purpose.
Tools Needed to Wire the Bathroom Exhaust Fan
Before we begin with our tutorial, we would like to shine a light upon the tools that you are going to need for this purpose. For starters, you will need a driver or driller to make a reference hole.
Next, you will also require a layout square and a pencil for making purposes. Using a tape measure, for perfect measuring, is also much-needed in this aspect.
Additionally, you will also need a saw for cutting holes on your roof or wall. You can use almost anything in this aspect. However, we would still suggest you use either a drywall or a reciprocator saw for this purpose.
Besides, you may also require an extension and a step ladder to climb to your house’s roof and walls, respectively.
Lastly, you should make sure to use safety goggles as well. They will help in protecting your eyes from the grimes and work correctly under challenging circumstances.
- Step: 1 – Cutting a Hole
Technically, the first step, in this case, would be to buy the exhaust fan. However, as it is quite obvious, we decided to leave it and move onto the next point. Hence, after you have bought the fan, then you will have to cut a hole.
You are going to install the vent system here, so you will have to be as precise as possible.
So, how are you going to do it? Well, for starters, you will have to mark the place of installation with a 16-inch nail on each of the corners of your ceiling or your wall.
You can use a pencil for the same aspect as well. However, make sure to measure the distance correctly with a measuring tape.
Now, once the measuring procedure is completed, then you will have to cut down the section. You can use either a reciprocating or drywall saw for this purpose.
Nonetheless, before you go into this cutting process, make sure to locate a joist first by using a stud sensor. It will make the whole procedure a lot easier.
- Step: 2 – Attaching The Fan
As of now, you have only cut a hole. So, it is time for you to make it of use. Now, you will be attaching your exhaust fan here.
Firstly, you will have to push the insulation back. It, in turn, will leave approximately a 6-inch gap between the insulation and the unit.
Now, you will need to cut small pieces of wood, preferably around 2 ft x 4 ft. They will help the fan to fit properly amid the joists. So, once you are done with it, all you need to do is attach the screws of the fans with wood pieces.
- Step: 3 – Cutting Through The Roof
As you have already completed the bathroom-based works, you will have to shift your focus to your roof. Yes, you have understood it right. You’ll have to cut a hole through it as well.
To do it, you will have to draw a circle under the roof. Make sure to pencil in a large one. Otherwise, you may encounter trouble while installing the tailpipe and the roof vent.
Now, you will have to drill a hole through the circle so that you can cut it down with a saw blade. In this aspect, you can use either a keyhole saw or a saber saw.
A reciprocator model can get the job done too. However, it won’t be as efficient as the others in this aspect. Anyways, getting back to the topic, after cutting the hole, you will have to remove the shingles from its surrounding areas.
Also, while you are at it, try not to damage the underlying roof paper.
- Step: 4 – Installing the Roof Vent
After such a prolonged period, now, it is time for you to set up the roof vent on the roof. While you are doing to, make sure to apply high-end adhesive around the undersides to seal everything properly.
Once you have completed the task, you will need to secure the vent flanges’ position by sticking roof nails into them.
Next, you will have to install the shingles around the roof vent. So, apply roofing cement in the places appropriately, and then, place the tiles or shingles on them. Make sure to do the ones around the roof vent and move on to the others subsequently.
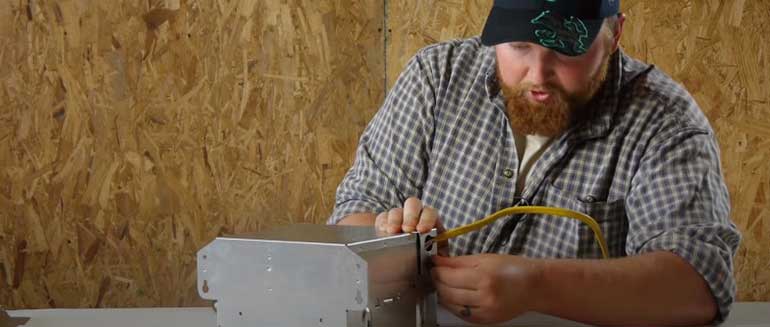
- Step: 5 – Wiring the Fan
So, after all these hardships, now you will know about how to wire a bathroom exhaust fan and light on separate switches. To complete this task, you will first have to slide clamps on the duct, which is located at the fan housing and the roof cap.
After that, try to pass the clamps through the tailpieces of the fan and the roof vent. Once you are done with it, make sure to tighten them as proficiently as possible.
Next, you will have to enfold the wire joints with duct tapes for safety purposes. Also, as you are trying to install both fans and light, you will have to use a three-wire cable, which needs to be connected from the fan to the switch.
After that, you can plug the motor of the fan into the receptacle. However, before you attach the wirings, make sure to read the manufacturer’s manual first.
- Step: 6 – Connecting the Switch with the Wires
To separate the switching of the fan and the light, you would, first, have to splice the wires. After that, you will have to connect the wire connectors with the grounds in a proper manner.
It is one of the most essential parts of the whole process. So, make sure to be as precise as possible.
Anyways, after that, you will have to connect power or electricity to both the switches. You can do so splicing two pigtails and attaching them to the feed wire.
Follow the manual of the manufacturer to understand where you should connect the wires. Once you have connected the wires, then all you will have to do is to turn the switches on to see if the fan and light are working or not.
Now, watch the video on wiring such fans:
https://youtu.be/TqrBUSa4ZQM
Conclusion
To be honest, the whole process of attaching an exhaust fan to your bathroom can be a bit intimidating at first. However, if you do follow each of the steps correctly, then you will not face any difficulties during the procedure. So, make sure to be careful, wear all the safety gear, and be as accurate as possible while working.