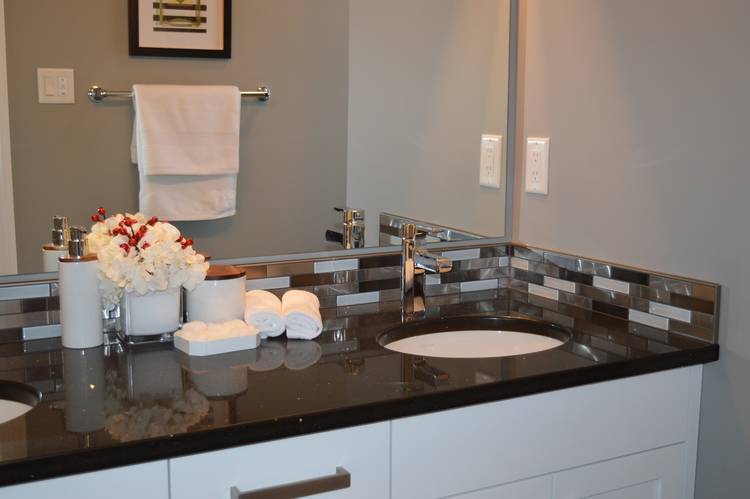
A bathroom vanity cabinet is not something you throw away when it gets old. Yes, over the passes of time it can look dirty and may seem to buy a new one.
But with a clever painting, you can give your vanity a new life. A beautiful bathroom vanity cabinet can uplift the overall beauty of your bathroom.
Painting a bathroom vanity is NOT that hard as it may sound. With the simple and easy-to-follow guides, you can easily paint your vanity. Many have done this and you can do it too!
How to Paint a Bathroom Vanity?

Before I proceed I must admit it’s a multi-step process and you need to follow the instructions very carefully to avoid a mess. You will need those following items:
- Wood putty.
- Sandpaper.
- Drop cloth.
- Paint & Paintbrush/foam roller.
Painting anything can go wrong if you don’t follow the right guide. Here is the step by step processes that you should follow:
Prepare Your Vanity
Vanity has many parts and in most cases, you must paint them separately. So you need to prepare your vanity first.
You can start by removing all the cabinet doors, drawers, and all the contents of the cabinets like towels & styling instruments. You will be painting those doors and drawers separately, so its better you set them aside to avoid mess and damage from the paint.
Use your vacuum cleaner to clean the floor where you will be painting. Then around your vanity, spread a drop cloth on the floor. Use the painter’s tape to tape down the edges of the drop cloth. This will prevent the drop cloth to move around while painting.
After you have removed all the drawers, doors, and false door fronts, you can put them on the drop cloth to paint separately. You should remove all the hardware like knobs and hinges as well. Store them in a plastic bag so that they don’t get lost.
Remove the countertop and the faucet as well. If you want to change the countertop and the faucet, now is the best time for you.
Mark all the hardware and all the parts of the vanity that you have separated so that you can reattach them easily.
Grime and buildup oil are the natural consequences to any vanity. You need to clean them off. Use dish soap and water to wash all the cabinetry surfaces. You can use either a wet sponge or scrubbing pad to clear the grim and buildup oil.
You don’t want to paint the underside of the vanity top, adjoining walls, and some other areas of the vanity where it meets the walls and floor. So mask off those areas using the painters’ tape. It will make sure you don’t accidentally paint those areas.
Fix the Dings & Deep Scratches
Now that you have prepared your vanity for the paint work, you need to make sure there are no dings, gouges, or scratches on the vanity. You can use wood putty to cover those surface flaws.
Using the wood putty and putty knife you can hide all the imperfections of your vanity. After you have applied the putty, let it dry. Wait for several hours to let the putty dry and harden.
After the waiting for the wood putty to dry, it’s time to use the sandpaper. You need to even out the level of the putty using the 220-grit sandpaper.
Notice whether there is any gloss finish on the wood. If there is any gloss finish, rub off the finish as well. Don’t forget to sand the inside corners of the vanity cabinet to make a good base for the paint to stick to.
Since you have used the sandpaper, there will be huge dust. Use the vacuum cleaner and damp rag to clean the dust. You should damp the rag using only water to wipe down the surface of the vanity. That way it will pick any leftover dust.
Apply Paint & Reassemble
There are 3 types of paints that you can apply to your vanity cabinets like oil-based paint, latex, or chalk-finish paint. If you go for the oil-based or latex-based paint, you need to use the primer first. For the chalk-finish paint, you don’t need to use any primer.
Many people don’t like oil-based paint because of its strong odor and sometimes it is very difficult to clean up. But it is popular for the hard finish and great leveling properties. I would recommend going for the latex or chalk-finish.
When applying the paint with the brush or a foam roller, follow the wood grain of your vanity cabinet. After the first application of the paint, allow it to dry. Then go for the second coat of paint. If you have small kids, it’s better if you go for the maintenance-free finish. If this is the case, apply a polyacrylic coat.
If the knobs and hinges are outdated, you can replace them as well. Carefully reassemble your vanity and you have just got a new vanity cabinet! Now watch an in-depth instructional video on how to paint a vanity. I think this will help you a lot.
Summing Up
As I said above, painting a vanity cabinet is easy and you have just seen it. Start from today to give your vanity a new life and look. Spread this instructional article to your friend circle as well.
