Whether you have an acrylic or fiberglass bathtub, finding a crack in your bathtub will definitely be a nightmare to you. The underneath of a bathtub is not flat like the floor.
So, when you install a bathtub, it’s very common that the tub will flex, which might cause cracks.
You need to fill the void under your bathtub to solve this problem. But how to fill the void under the bathtub?
This is not an easy process, and it requires multiple steps to be completed perfectly. I will talk about this process in-depth.
Assessing the Bathtub Void
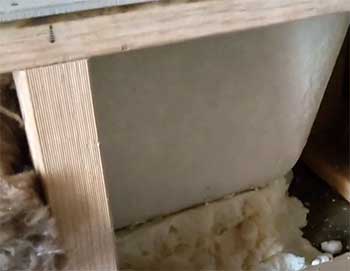
The first step is to assess the physical characteristics of the space under your bathtub. Here are some key things to look for:
- Size – Measure the length, width, and depth of the void. This will determine how much fill material you need.
- Levelness – Check that the subfloor is level using a level tool. Any uneven spots need to be filled and leveled before installing the tub.
- Structural integrity – Inspect the subfloor for any cracks, rotting, or other damage that needs repairing prior to filling the void.
- Plumbing – Note any drain pipes, overflow tubes, or other plumbing that protrudes into the space under the tub. The fill material will need to accommodate these.
- Moisture – Check for any leaks, moisture damage, or mold on the subfloor. Fix any water issues before filling the bathtub cavity.
Once you’ve assessed the physical characteristics, you can determine the right fill material and quantity needed for your specific tub void.
Step By Step Guide To Fill Void Under Bathtub

If you notice that your bathtub flexes or gets really cold, you might need to fill the void under the bathtub.
Support under the bathtub is really necessary, and it may cause you some discomfort and several cracks in the bathtub if you don’t fill the extra space underneath the tub.
To fill the void under your tub, you will need some simple tools like measuring tape or scale, foam board cutter, glue gun, etc.
Now let us walk you through the step by step guide to fill the void under your bathtub –
- Select The Stabilizer
First of all, you need to select a perfect stabilizer to create strong and perfect tub support. There are different kinds of stabilizers that can be found in the market, but you have to select the right one based on some characteristics.
Plaster of Paris is a very common stabilizer often used underneath the bathtubs to fill the void. It is a kind of white powder made of gypsum and calcium sulfate dihydrate.
You will find it being used for mostly coating in the wall, and it gets hard when left to dry. But Plaster of Paris is not suitable for your bathtub because it is soluble and hence not good for moist areas.
Another stabilizer that is often used for bathtubs is the thin-set mortar. Mortar under bathtub keeps the bathtub stable and free from flex. But it has disadvantages also.
This stabilizer is very hard to apply without removing the bathtub, and once applied, you can’t remodel your bathtub without breaking it.
Now the question is, which stabilizer should you use? Well, expanding foam can be the best solution to your problem. Let us explain why.
Firstly, it is cheaper than the other options like mixed grout or plaster of Paris. Secondly, you can spread it evenly without any hassle, and it will expand on its own.
And finally, it will give you the perfect rigidity that you expect.
- Measure The Void
The second and most important step is to measure the void accurately. You will need a larger scale or measuring tape for this.
If the height of the void is more than one inch, you need to use a different kind of foam beneath the tub because only expanding foam can’t cover this much space.
Let’s assume the void is higher than one inch. In that case, you will need to cut Styrofoam or rigid foam for making a base for the void according to the measurement.
Styrofoam under the bathtub along with expanding foam will give you the strong base that you need to control the flex. Some people use drywall board instead of Styrofoam because of its easy access.
But it’s best to use Styrofoam or rigid foam as the base because expanding foam works better on these kinds of foam.
- Placement of The Base
After cutting the Styrofoam or drywall board or rigid foam, whichever you choose, place the pieces under the tub for making a strong base. You need a glue gun for this. If you don’t have a glue gun, you can just use a spatula.
Spread the glue evenly to the surface of the pieces. Remember, you need to use a good amount of glue on the pieces; otherwise, there’s a chance that the base will not stay in place.
You can also apply thin-set mortar to the pieces instead of glue. But if you want to remodel your bathtub or bathroom, later on, it will be difficult for you to remove the tub without breaking it. So be careful of that.
- Apply The Expanding Foam
Expanding foam for under bathtub will be the best choice for you to fill the void. It’s very easy to use because it also comes with spray bottles. Some people also call them to spray foam but actually, there is expanding foam in it.
Two types of spray foam are available in the market. They are open and closed cells. Open-cell spray foam allows air to come inside its bubble and expand.
On the other hand, close cell spray foam gets the gases trapped inside the bubble.
These spray foams are divided by their expansion level as well. Spray foam is available in low, mid, and high expansion levels.
For use underneath the bathtub, you should choose the spray foam with mid expansion level and the one with closed-cell.
Closed-cell spray foam will give you the rigidity you want and the mid-level expanding spray foam will provide you the perfect expansion without harming the wall and bathtub.
Spray the expanding foam evenly on half of the total pieces that you’ve placed earlier. Make sure that you spray it over every corner of the void. Doing it that way, cover 50% of the void. Then comes the next step.
- Place Some Weight On The Bathtub
You need to examine how your bathtub reacts when there will be a weight on it, right? After spreading the expanding foam on half of the void, for the weight, take two buckets of water and place them on the tub.
Then apply the rest of the foam under the tub. The tub won’t move now because of that extra weight and the foam will be set without any disturbance.
There you go. That is the whole process of how you can fill the void under the bathtub. Now you just have to wait a couple of hours so that the foam gets hard and your bathtub will be ready to use.
This video explains the same using just spray foam!
Tips on Applying the Foam
The way spray foam comes in is tough to use under the tub, especially if you want to reach the corner. Here’s a simple trick that you should follow to make a perfect spreading.
- You will need a narrow plastic tube for this. You can find it in any hardware store.
- Take the nozzle of the spray bottle, fit the tube with the nozzle.
- Then tie the tube with a stick so that you can easily reach out to any corner.
Troubleshooting Common Bathtub Void Problems
Even when carefully installed on a filled tub void, problems can sometimes occur. Here are some common void-related issues and how to fix them:
Tub rocks or shifts
- Loose fill material or uneven subfloor is likely the culprit. Drain the tub and inject expanding foam or mortar to stabilize the tub base.
Creaking noises
- Shims may be loose or compressed. Wedge wood glue-coated shims into gaps then caulk the tub perimeter.
Slow or back up drain
- Foam or mortar fill may block the drain pipe slightly. Snaking the drain should remove any debris clogs.
Damage to plumbing
- Direct contact between plumbing and firm fill can cause cracks or leaks. Wrap pipes in insulating foam sheets first to prevent pressure damage.
When to Call a Pro?
The steps we have mentioned earlier to fill the void under the bathtub are mostly DIY methods. If you have enough patience, you will be able to do this easily.
But you might face some difficulties after applying the foam. Sometimes the foam doesn’t stick to the tub properly, or the base can be moved accidentally.
It can be a complete mess for a tiny mistake. So, if you feel that something is wrong, you should call a professional plumber to get the job done.
Frequently Asked Questions (FAQs)
Some common options for providing support under a bathtub include:
Mortar or concrete – This creates a very solid base that conforms to the tub shape.
Expandable polyurethane foam – Foam provides cushioning and insulation. Look for high-density foam rated for bathtub support.
Rigid foam boards – Foam boards are lightweight yet offer support when installed properly. They insulate too.
Wood shims/blocks – Shims work for minor filling needs but don’t provide structural support.
Compacted gravel – Gravel fills space but requires a structural floor to support tub weight.
The best foam for use under a bathtub is high-density polyurethane expanding foam. Key things to look for include:
1. Density of 2-3 lbs per cubic foot
2. At least 30% expansion rate to fill voids
3. Water resistance and low moisture absorption
4. High compressive strength rating
5. Formulated for bathtub/shower installation
Apply expanding foam designed specifically for filling tub cavities in layers to avoid shrinkage gaps.
To level an uneven floor under a bathtub:
1. Check for high and low spots using a 4-foot level.
2. Grind down any high areas if possible.
3. Fill low spots with expanding foam, mortar, or wedges.
4. Pack shims tightly into gaps between existing floorboards.
5. Pour self-leveling cement to fill large low areas.
6. Install bathtub support boards around cavity rim.
7. Adjust tub or shim during installation until completely level.
The basic process for installing mortar under a bathtub is:
1. Build temporary forms around the tub cavity perimeter.
2. Mix mortar to a firm consistency according to package directions.
3. Fill cavity halfway up with mortar around plumbing first.
4. Insert any needed rebar or wire mesh reinforcement.
5. Fill remainder of forms with mortar, smooth and level surface.
6. Allow mortar to fully cure for 1-2 days minimum.
7. Carefully remove forms and install bathtub, shimming as needed to level.
8. Let tub weight evenly compress mortar for maximum support.
Final Words
Filling the void under the bathtub is a bit complicated once the bathtub is installed. Expanding foam or spray foam is the easiest solution for this, and it can be used in any kind of bathtub.
No one wants a crack in their bathtub. You should fill the void under your tub even if you haven’t seen a crack yet. We have provided a guide on how to fill the void under the bathtub.
Follow the processes one by one, and you will be able to get a flawless bathtub that doesn’t flex or crack.
Recent Posts
Olivier Midy Face Oil Reviews From My Experience: Is It Worth It?
You deserve skincare that nourishes and revitalizes your complexion with natural ingredients. Olivier Midy face oil stands out with its blend of botanical extracts and promise of glowing...
Round Lab Dokdo Cleanser Review From My Experience: Is It Worth It?
Selecting a safe, effective facial cleanser requires evaluating skin barrier compatibility, surfactant stability, and pH optimization.You need a dependable face wash that lifts impurities cleanly...