
Homax Tough As Tile can make an old bathtub, sink, or tile surround look dramatically better without replacing the fixture. But it is also one of those refinishing products where small application mistakes can create very visible problems.
Current customer reviews are genuinely mixed. Recent Lowe’s reviews include successful transformations, but other buyers report rough finishes, rapid drying, chipping, strong odor, and application difficulties. Lowe’s currently shows roughly a 3.4/5 rating for one Tough As Tile kit, with 60% recommending it.
The important point is that many Homax Tough As Tile problems are closely connected to preparation, temperature, humidity, coat thickness, timing, or surface compatibility.
According to Homax/PPG, the product is intended for ceramic, porcelain, fiberglass, and acrylic-composite surfaces. It should not be used on kitchen sinks, hot tubs, stainless steel, stone, concrete, toilet-bowl interiors, exposed metal, or areas that remain continuously immersed in water.
Here are the problems I would watch for before starting.
Homax Tough As Tile Problems at a Glance
| Problem | Likely Cause | What Helps |
| Peeling or chipping | Poor prep, contamination, wrong substrate | Strip loose coating and correct the surface |
| Finish stays tacky | Heavy coats, humidity, wrong temperature | Allow full cure; don’t use until hard |
| Runs and sags | Too much product | Apply thinner coats |
| Orange peel | Spray coat too light or poor technique | Adjust spray application |
| Brush/roller marks | Reworking partially dried coating | Maintain wet edge and work quickly |
| Bubbles | Shaking brush-on product or contamination | Stir brush-on gently; clean carefully |
| Weak coverage | First coat too thin or dark original color | Use 2–3 thin coats as specified |
| Spray nozzle spits | Clogged tip or wrong can temperature | Clean nozzle and keep can at 70–80°F |
| Strong fumes | Solvent-based coating | Serious ventilation and PPE |
| Early scratches | Coating used before fully cured | Wait at least 48 hours and verify hardness |
Customers have mentioned a lot of problems while using them. Here are some of them.
- Peeling and Chipping
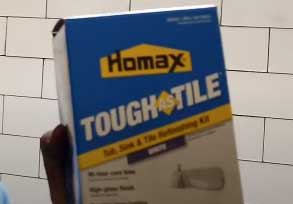
Peeling is probably the problem people worry about most.
Recent customer feedback includes reports of Tough As Tile beginning to chip or flake soon after application, although other users report good durability when they follow the preparation steps carefully.
The manufacturer puts enormous emphasis on preparation.
The current instructions tell you to remove old caulk, eliminate mildew, remove grease, oils, soap film, and hard-water deposits, scour the entire surface, clean it again, repeat the scouring/cleaning process, dry it, and finally wipe it with isopropyl alcohol.
That is considerably more preparation than simply sanding a bathtub and painting it.
Silicone residue is especially troublesome because coatings don’t bond well to it.
Skin oils can interfere too, which is why Homax specifically tells installers to wear gloves while preparing the surface.
If Tough As Tile is already peeling, painting another coat over loose material is unlikely to solve the underlying problem. The failed coating needs to be dealt with and the substrate properly prepared before refinishing.
- Tough As Tile Stays Tacky or Soft
A coating that still feels rubbery, sticky, or easy to indent shouldn’t be put into service.
Homax currently specifies a minimum cure period of 48 hours at 70–80°F with humidity below 80%. It also says the tub or sink should not be used until the coating has cured hard like a porcelain surface.
That is much more useful guidance than simply saying, “wait two days.”
Temperature and humidity matter throughout curing.
Heavy application can also slow solvent release. Homax repeatedly warns that multiple thin coats produce better results than fewer heavy coats.
Some customer reviews report coatings remaining soft even after longer waits, so if the surface remains tacky well beyond the manufacturer’s cure period despite correct conditions, I would stop using the fixture and contact Homax rather than assuming another week will automatically solve it.
- Runs and Sags
Tough As Tile can run surprisingly easily.
This is particularly frustrating on vertical bathtub and shower-wall surfaces.
Homax identifies over-application as the cause of sags and tells users to apply thin, even coats.
For brush/roll application, the finish starts becoming sticky very quickly. Runs should be corrected almost immediately.
The manufacturer’s troubleshooting instructions say a fresh run can be brushed out within about two minutes. If it has already begun setting, Homax provides a separate correction procedure involving a short waiting period and rubbing alcohol before allowing the repair to dry.
The safest strategy is prevention.
Don’t try to achieve complete coverage with one thick coat.
- Orange Peel or a Dull Finish
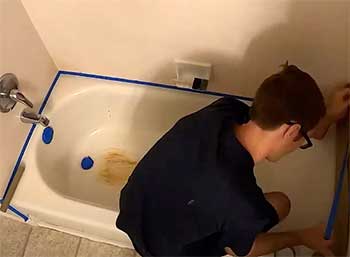
A rough, pebbled finish is often described as orange peel.
Interestingly, Homax’s current spray instructions say an orange-peel or low-gloss second coat may happen when the final spray coat is too light to flow together properly.
But going too far in the opposite direction causes runs and sags.
That makes the aerosol version technique-sensitive.
Homax recommends practicing on smooth glazed ceramic tiles before spraying the actual tub or sink.
High humidity can also dull the finish. The manufacturer again specifies keeping humidity under 80%.
Recent reviewers still mention gritty or rough finishes, so this is not merely a theoretical problem.
- Tough As Tile Dries Too Fast While You’re Applying It
This is one of the product’s trickiest characteristics.
Current Homax instructions say the brush/roll finish can begin getting sticky within about one minute, and you shouldn’t try to repaint previously coated areas after approximately two minutes. That means excessive brushing can make the surface worse rather than smoother.
You need to maintain a wet edge and keep moving.
For the current brush/roll product, Homax specifies a shed-free 4-inch roller with a 1/4-inch nap or an appropriate polyester brush. It specifically says not to use a foam roller.
This is also why practicing before attacking the bathtub itself makes sense.
- Bubbles in the Finish
The preparation and mixing method matters here.
For the brush/roll version, Homax says to gently stir and not shake the product, because shaking introduces bubbles into the finish.
The aerosol version is different—the can is supposed to be shaken before spraying.
Bubbles or adhesion defects can also result when you’re coating over contamination such as soap film, silicone, grease, dust, or residual cleaning products.
Your existing article recommends letting the cleaned surface dry for “72+ hours.” The manufacturer does not currently require that blanket waiting period. It says to dry the surface completely, wipe with isopropyl alcohol, and allow that to dry.
- Poor Coverage
Don’t panic if the first coat looks disappointing.
Homax specifically says not to expect complete hide from the first brush/roll coat.
Current instructions indicate that light-colored surfaces typically require 2–3 thin coats, while dark surfaces may require three coats and potentially additional product.
Trying to force full coverage with one heavy coat is more likely to create sags and slow curing.
Timing between coats is also critical.
For the current brush/roll instructions, the second coat goes on after approximately three hours, but not after six hours. Spray coats use different timing, with the next coat beginning after about ten minutes while remaining within the manufacturer’s six-hour window.
Follow the instructions packaged with your exact product because formulations and directions can change.
- Spray Nozzle Spitting and Overspray
The aerosol version has two separate issues: nozzle behavior and overspray.
Homax’s own troubleshooting section includes a specific procedure for a dripping or spitting nozzle: clean the spray tip, shake the can again, check the nozzle for blockage, and make sure the can is around 70–80°F.
The company also instructs you to wipe the nozzle periodically and clear it after coats.
Overspray is another concern.
Recent Home Depot customers have complained about paint droplets and powdery residue from the aerosol application.
Protect far more of the bathroom than just the immediate edge of the tub.
- Strong Chemical Odor and Fumes
This shouldn’t be treated merely as an unpleasant smell.
The product’s instructions contain significant solvent warnings.
The spray formulation includes solvents such as methyl acetate, n-butyl acetate, xylene, and ethylbenzene, while the brush/roll product also carries flammable-vapor and inhalation warnings. Homax says to provide fresh-air ventilation during application and drying and notes that an appropriate certified respirator may provide additional protection when used correctly.
Keep ignition sources—including flames and equipment that can spark—away from the work area. This is one area where I would follow the label rather than improvising with a household fan.
- The Finish Gets Damaged After Installation
Even a properly cured Tough As Tile surface has usage limitations.
Homax specifically warns against using bath mats or suction cups on the refinished surface because they can damage it.
For cleaning, PPG recommends a soft sponge or cloth with non-abrasive, non-bleach cleaners after curing.
That means abrasive powders, scouring pads, harsh cleaners, and suction-cup accessories can shorten the useful life of your refinishing job.
Solution On Problems Of Homax Tough As Tile
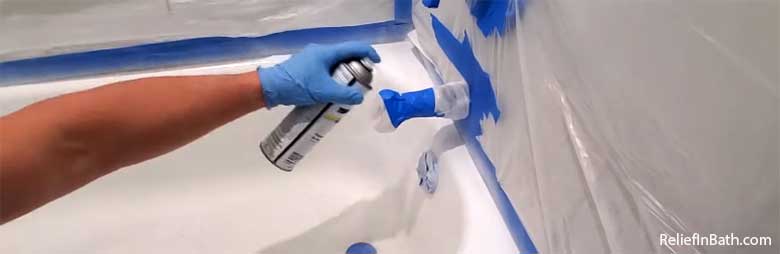
Though the problem people face using Homax Tough for tiling a particular is not uncommon, you can prevent or minimize the issue if you follow some effective solutions.
- Clear The Surface Properly
When it comes to cleaning, we all become lazy. Make sure to remove all Soap, grease, and r silicone-based residue from your desired surface.
Otherwise, these unwanted things will prevent you from achieving a fine and generous coating.
- Stick To The Instruction Manual
Just because you have used spray paint several times in the past doesn’t mean you have become a master of spray paint.
Some crucial details might be there to use the product correctly. Thus, never overlook the information.
- Take Enough Time For Preparation
Hurried things are always given inconvenient results. First, you have to prepare the tiling surface precisely to achieve the finest result.
Using sandpapers, primers, and other additional things might be necessary to ensure nothing is missing.
More importantly, it is crucial to know whether the surface you want to tile is appropriate for the Homax Tough or not. Otherwise, everything will go in vain.
- Don’t Use It If You Are Newbie
Are you applying spray paint for the first time? Then, avoid doing it independently. Homax Tough is more tricky to use than typical spray paints.
You must need a helping hand who has extensive knowledge about painting. Hiring a professional will be more appropriate if you have a decent budget.
- Use A Fan To Cure Faster
One of the most common problems many users complained about is that Homax Tough takes a considerable time to cure. Using a fan can reduce the curing time.
But make sure the paint is properly dried, so nothing will blow away. And the fan speed should be kept low for smooth airflow, which won’t create extra pressure.
How to Prevent Bubbling with Tough As Tile
Follow these tips for a bubble-free Tough As Tile finish:
- Allow surfaces to fully dry 72+ hours after cleaning before painting
- Always check compatibility and avoid using on laminate, vinyl, wood or previously painted surfaces
- Thoroughly remove all grease, soap scum and existing caulks beforehand
- Apply thin, even coats allowing proper drying time between each
- Maintain room temperature between 50-90°F throughout the application process
Catching and troubleshooting the source of bubbling right away improves your chances of a successful Tough As Tile finish.
Frequently Asked Questions (FAQs)
You can remove Homax Tough from a particular surface using a paint scraper. But first, apply a mixture of paint stripper and sand and apply the paste on the surface where you want to remove the tile layer.
Then use the paint stripper to remove the paint after one hour of drying time.
Generally, they take around 48 hours to become fully dry.
Homax Tough can last for several years if you apply them properly with a perfect finish.
Bubbles in Tough As Tile are usually caused by trapped moisture, painting over incompatible materials, surface contamination, applying too thickly, or extreme temps during application.
A rough Tough As Tile finish can stem from poor surface prep, overly thick application, additives, spray technique issues, or curing disruptions. Proper thin coats and ideal conditions are key for smooth results.
While Tough As Tile dries within hours, it takes 3-5 days before light use, 5-7 days before normal use, and up to 2 weeks to fully cure and achieve maximum durability. Have patience!
Conclusion
Have you decided to purchase after learning about Homax Tough as tile problems? Yes, you can use them when you know the right application method and have enough patience to wait for perfect curing.
Talking with a pro appears to be a better decision if you use it for the first time. This will ensure a better result.
2 thoughts on “Homax Tough As Tile Problems: 10 Common Issues and How to Fix Them”
Leave a Reply
Recent Posts
2026 Bathroom Remodel Estimator Bathtub to Shower Conversion Cost Calculator Accurately calculate the true cost of converting your old bathtub into a modern walk-in shower. Estimates acrylic...
I used the Philips Multigroom 5000 for several weeks of beard hair and body grooming while tracking cutting performance battery life ease of cleaning and everyday versatility.You should buy this...
Can I reapply over homax . I have spots that are starting to show
Yes, I have repainted the same shower stall three times. Just be sure to use a sander so that it is all smooth for paint application. The paint adhered well to what I had previously painted.