When I renovated my bathroom last year, I faced a dilemma: should I use caulk or grout for the shower corners? Both materials seal and protect, but choosing the wrong one can lead to leaks, cracks, or a shoddy look.
In this article, I’ll share my journey of understanding caulk and grout, comparing their strengths and weaknesses to help you make an informed decision for your shower.
With a conversational yet analytical approach, I’ll break down their features, applications, and performance to ensure your bathroom stays functional and beautiful.
A Brief Comparison Table
| Feature | Caulk | Grout |
| Material Composition | Silicone, acrylic, or latex-based | Cement, sand, and additives |
| Flexibility | Highly flexible, absorbs movement | Rigid, prone to cracking under stress |
| Water Resistance | Excellent, fully waterproof | Good, but porous unless sealed |
| Application Areas | Corners, joints, seams | Between tiles, flat surfaces |
| Ease of Application | Easy, applied with a caulk gun | Moderate, requires mixing and troweling |
| Durability | 5-20 years, depending on type | 10-15 years with proper sealing |
| Maintenance | Easy to clean, may need reapplication | Requires periodic sealing |
| Aesthetic Finish | Smooth, clean lines | Textured, matches tile appearance |
| Cost | $5-$20 per tube | $10-$30 per bag |
Understanding Caulk: The Flexible Protector

When I first tackled my shower project, I thought caulk was just a quick fix for gaps. I was wrong—it’s a powerhouse for specific bathroom areas. Caulk is a sealant, typically made from silicone, acrylic, or latex, designed to fill joints and seams where movement occurs.
In showers, corners where walls meet or where walls join the floor are prime spots for caulk because tiles shift slightly due to temperature changes or structural settling.
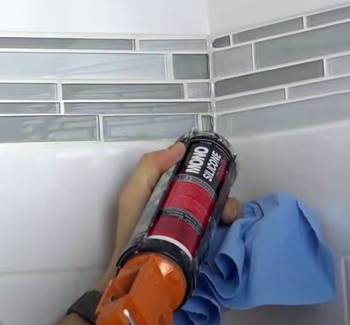
Silicone caulk became my go-to after researching. It’s 100% waterproof, mold-resistant, and flexible, making it ideal for wet environments. I used a high-quality silicone caulk in my shower’s vertical corners, and it’s held up through daily showers without a hint of mold.
Acrylic caulk, while cheaper, didn’t impress me—it’s less durable and struggles with constant moisture. Latex-based caulk, often paintable, works better for less wet areas, like around a sink, but I wouldn’t trust it in a shower’s high-traffic zones.
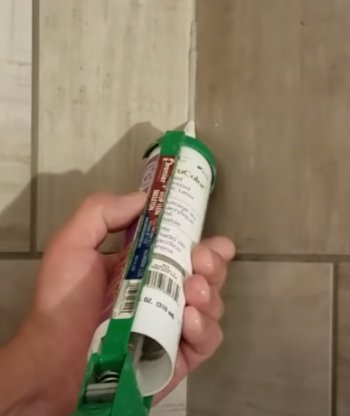
The application process is straightforward. I grabbed a caulk gun, cut the tube’s tip at a 45-degree angle, and applied a smooth bead along the corner.
A damp finger smoothed it out for a clean finish. The downside? Caulk can degrade over time, especially if you skimp on quality. I learned to check for cracks or discoloration every few months, as reapplying is easier than dealing with water damage.
Pros And Cons of Caulk
Pros
- Unmatched Flexibility for Dynamic Joints: Caulk’s elasticity is its superpower. In my shower, the corners where walls meet experience subtle shifts from the house settling or temperature swings in our humid climate. Silicone caulk absorbs these movements like a champ, preventing cracks that could let water sneak behind tiles. This flexibility saved me from potential leaks in areas where rigid materials would’ve failed.
- Exceptional Waterproofing for Wet Zones: Silicone caulk is 100% waterproof, forming an impenetrable barrier. During my renovation, I tested this by running the shower for hours—water beaded off the caulked corners without a single drip penetrating. Unlike grout, which can absorb water if not sealed, caulk ensures your shower stays bone-dry behind the scenes.
- Beginner-Friendly Application: Caulking is a DIY dream. With a $10 caulk gun, a utility knife, and some painter’s tape, I sealed my shower corners in under an hour. The process is forgiving—apply a bead, smooth it with a damp finger, and wipe away excess. Compared to grout’s messy mixing, caulk feels like a quick win for novices like me.
- Robust Mold and Mildew Resistance: In my humid bathroom, mold is a constant threat. Silicone caulk’s mold-resistant properties have kept my shower corners pristine for over two years, even with daily use. I’ve barely had to scrub, unlike some grout areas that needed extra care. This makes caulk a low-maintenance choice for hygiene-conscious homeowners.
- Aesthetic Versatility for Any Design: Caulk comes in clear, white, or colored varieties, letting you tailor the look. I chose clear silicone for my white subway tiles, creating a seamless, modern finish that doesn’t distract from the tilework. Colored caulk can match or contrast tiles, giving you creative control over your shower’s vibe.
- Quick and Painless Repairs: When a small section of caulk started peeling in my shower, I fixed it in 15 minutes—cut out the old, reapply, and done. This ease of repair is a lifesaver compared to grout’s labor-intensive fixes. Regular inspections let me catch issues early, avoiding costly water damage.
- Adaptability to Mixed Materials: Caulk excels where different surfaces meet, like tile-to-glass or tile-to-metal. In my shower, I used it around the glass door frame, ensuring a watertight seal despite the materials’ different expansion rates. This versatility makes caulk indispensable for complex shower designs.
Cons
- Finite Durability Requires Reapplication: Even premium silicone caulk doesn’t last forever. After two years, I noticed slight yellowing in high-traffic corners, hinting at future replacement. Depending on quality and exposure, caulk may need redoing every 5-10 years, which can feel like a recurring chore compared to grout’s longer lifespan.
- Not Suitable for Large or Flat Areas: Caulk is useless for wide gaps or flat tile surfaces. I once tried filling a larger-than-recommended gap, and the caulk sagged, creating an uneven, unprofessional look. For broad tile-to-tile spaces, grout is the only option, limiting caulk to narrow joints and corners.
- Cure Time Disrupts Bathroom Use: Silicone caulk needs 24-48 hours to cure fully, meaning no showers during that period. I underestimated this once, forcing my family to use the guest bathroom for two days—an inconvenience I hadn’t planned for. Timing your project is critical to avoid disruptions.
- Premium Quality Comes at a Cost: High-quality silicone caulk costs $10-$20 per tube, pricier than basic grout mixes. I was tempted by $5 acrylic caulk, but its poor performance in wet areas made me regret skimping. Investing in silicone is non-negotiable for shower durability, stretching your budget.
- Surface Prep Is Critical: Caulk demands clean, dry surfaces for proper adhesion. In my haste, I once applied caulk over a slightly damp corner, and it peeled within weeks, requiring a redo. Thorough cleaning and drying add prep time, and any oversight can compromise the seal.
- Potential for Messy Application: While caulking is easier than grouting, it’s not foolproof. My first attempt left uneven beads and smudges, requiring cleanup. Mastering a steady hand and proper technique took practice, and mistakes can detract from the shower’s polished look.
Understanding Grout: The Tile’s Best Friend

Grout, on the other hand, felt like the backbone of my tilework.
It’s a cement-based mixture, often with sand or additives, used to fill gaps between tiles.
In my shower, I used grout for the flat surfaces between wall and floor tiles, creating a cohesive, textured look. Grout comes in two main types: sanded and unsanded.
Sanded grout, with its gritty texture, is great for wider gaps (over 1/8 inch), while unsanded suits narrower spaces.
I chose epoxy grout for my shower floor because it’s non-porous and resists stains better than cement-based options. Mixing and applying grout was messier than caulk.
I had to blend the powder with water, trowel it into the gaps, and wipe away excess with a sponge. The process took patience, but the result was a seamless, tile-integrated look that caulk couldn’t match.
Grout’s rigidity, however, is a double-edged sword. While it’s durable, it can crack if the shower’s structure shifts. I also learned that cement-based grout is porous, so sealing it annually is a must to prevent water seepage and mold.
My first attempt at sealing was sloppy, but once I got the hang of it, the grout stayed pristine.
Pros And Cons of Grout
Pros
- Seamless Aesthetic Cohesion: Grout’s ability to blend with tiles is unmatched. In my shower, medium-gray grout between white subway tiles created a polished, cohesive look that tied the design together. Unlike caulk’s smooth lines, grout’s texture matches the tiles, making the shower look like a single, unified surface.
- Exceptional Longevity with Proper Care: When sealed correctly, grout can last 10-15 years without issues. My epoxy grout on the shower floor has endured two years of heavy use without a scratch, while sealed cement-based grout on the walls remains solid. This durability makes grout a long-term investment for stable areas.
- Structural Integrity for Tiles: Grout acts like glue, locking tiles in place to prevent shifting or cracking. In my shower, the grout between wall tiles created a rock-solid surface that feels sturdy even under pressure. This structural support is critical for large tiled areas prone to stress.
- Versatile Options for Every Project: Grout’s variety—cement-based, epoxy, or urethane, in countless colors—offers flexibility. I used epoxy for its stain resistance on the floor and cement-based for cost savings on walls. This range lets you customize grout to your budget, design, and performance needs.
- Cost-Effective for Large Surfaces: A $15 bag of cement-based grout covered my entire shower, making it more economical than caulk for big projects. Even epoxy, at $30 for a smaller batch, was worth it for high-wear areas like the floor, balancing cost and performance.
- Customizable Texture and Finish: Sanded grout’s gritty texture suits wider gaps, adding a tactile quality, while unsanded grout is smoother for tight spaces. I used sanded grout for my floor’s larger gaps, enhancing both durability and visual depth, giving my shower a professional edge.
- Enhanced Design Versatility: Grout can be a design element. I experimented with contrasting grout colors to make my tiles pop, and the result was stunning. Whether you want a subtle blend or bold contrast, grout lets you elevate your shower’s aesthetic in ways caulk can’t.
- Resilience in High-Traffic Areas: Epoxy grout, in particular, shines in high-wear zones like shower floors. Mine has resisted stains from soap and shampoo, unlike cement-based grout, which needed extra cleaning. This resilience makes grout ideal for areas under constant use.
Cons
- Rigidity: Prone to cracking in areas with movement, like corners.
- Porosity: Cement-based grout absorbs water unless sealed regularly.
- Application Complexity: Requires mixing, troweling, and cleanup, which can be time-consuming.
- Maintenance: Needs periodic sealing to maintain water resistance.
Where To Use Caulk In Your Shower?
After trial and error, I realized caulk shines in areas with movement or where different materials meet.
Shower corners—where two walls or a wall and floor intersect—are perfect for caulk.
The flexibility prevents cracks as the house settles or temperatures fluctuate.
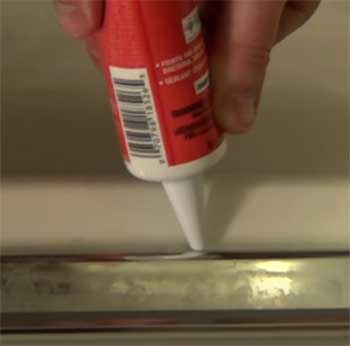
I also used caulk around the shower base where it meets the tiles, as this joint experiences constant water exposure and slight shifts.
Another spot is around fixtures like faucets or showerheads. I applied a thin bead of silicone caulk to seal these areas, ensuring no water sneaks behind the tiles. For my shower niche, caulk was a lifesaver.
The corners of the niche, where tiles meet at different angles, needed a flexible seal to handle water and movement without cracking.
Where To Use Grout In Your Shower?
Grout is the star for flat, stable surfaces. I used it between all the wall tiles and floor tiles where no significant movement occurs.
It creates a solid, cohesive surface that looks like a single piece of art. For my shower floor, I opted for epoxy grout because it’s non-porous and handles water better than cement-based grout. Around the shower drain, grout worked better than caulk to fill the gaps between tiles, maintaining a consistent look.
One mistake I made early on was using grout in a corner joint. It cracked within months due to slight wall movement. That taught me to stick with caulk for dynamic areas and reserve grout for tile-to-tile connections.
Comparing Application Processes of Caulk And Grout

Applying caulk was a breeze compared to grout. For caulk,
I needed a caulk gun, a utility knife, and some painter’s tape for clean lines. I spent about 30 minutes sealing all the corners in my shower.
The key was keeping a steady hand and smoothing the bead with a damp finger.
Cleanup was minimal—just wiping away excess with a rag.
Grout, however, was a project. Mixing the powder to the right consistency took practice, and spreading it with a trowel was messy.
I spent hours grouting my shower walls, ensuring every gap was filled, then wiping away excess with a sponge.
The process wasn’t hard, but it was time-intensive. Sealing the grout a week later added another step, but it was worth it for the durability.
Durability And Maintenance Face-Off
In my experience, caulk and grout both hold up well, but their maintenance needs differ. Silicone caulk in my shower corners has lasted two years without issues, but I inspect it regularly for signs of wear.
If it starts to peel or mold, I’ll cut it out and reapply—a quick fix. Grout, however, requires more proactive care. I seal my cement-based grout annually to keep it water-resistant. Epoxy grout in the shower floor has been low-maintenance, but it was pricier upfront.
Caulk’s flexibility makes it less prone to cracking, but it may not last as long as grout in stable areas. Grout’s rigidity ensures longevity between tiles, but without sealing, it’s vulnerable to water damage.
Your choice depends on how much upkeep you’re willing to do.
Aesthetic Considerations of Caulk And Grout
Aesthetics played a big role in my decision. Caulk’s smooth, clean lines gave my shower corners a polished look, especially with clear silicone. It blends seamlessly, letting the tiles take center stage.
Grout, however, matched my tiles perfectly, creating a uniform texture across the walls and floor. I used a medium-gray grout to complement my white subway tiles, and the contrast added depth to the design.
If you want a minimalist, sleek look, caulk in corners is the way to go. For a traditional, tiled appearance, grout between tiles is unbeatable. I mixed both in my shower for balance—caulk in corners, grout everywhere else.
Cost Breakdown of Caulk And Grout
Budget was a factor in my project. A tube of high-quality silicone caulk cost me $12 and covered all my shower’s corners.
For larger areas, grout was more economical. A 25-pound bag of cement-based grout cost $15 and covered my entire shower. Epoxy grout was pricier at $30 for a smaller quantity, but its durability justified the cost for the floor.
If you’re on a tight budget, caulk is cheaper for small jobs, but grout stretches further for big tile projects. Factor in tools—caulk guns are $10, while grout tools (trowel, sponge) might run $20 total.
Environmental And Practical Considerations
Living in a humid climate, I worried about mold.
Silicone caulk’s mold resistance was a game-changer, especially in corners where water pools.
Grout, unless sealed or epoxy-based, can harbor mold if neglected.
I also considered ease of repair. Replacing caulk is simple—cut out the old, apply the new.
Grout repairs are trickier, requiring chiseling out old material and reapplying.
For DIYers like me, caulk is more forgiving. A beginner can achieve a decent result with minimal practice. Grout demands precision to avoid uneven lines or excess residue, which can ruin the look.
Making The Decision: My Approach
After weighing both options, I used caulk for all shower corners, around fixtures, and in the niche, prioritizing flexibility and water resistance. Grout went between tiles on walls and the floor, with epoxy grout around the drain for extra durability. This hybrid approach gave me a watertight, long-lasting shower with a professional finish.
Your decision depends on your shower’s design, budget, and maintenance preferences. If you’re tiling a large area, grout is essential for stability and aesthetics. For corners and joints, caulk’s flexibility and ease make it the smarter choice.
Whatever you choose, invest in quality materials—cheap caulk or grout will cost you more in repairs.
Frequently Asked Questions (FAQ)
Caulk is better for corners and joints where movement occurs, as it’s flexible and waterproof. Grout is ideal for filling gaps between tiles on flat surfaces for a cohesive look.
Silicone caulk is the best sealant for shower corners due to its flexibility, waterproofing, and mold resistance.
Grout is typically used around a shower drain to fill tile gaps, but caulk may be applied where the drain meets the tile for a flexible seal.
Caulk is best for shower niche corners to handle movement and ensure a watertight seal, while grout fills gaps between niche tiles.
Conclusion: Your Shower, Your Choice
Choosing between caulk and grout for your shower corners doesn’t have to be overwhelming. I learned that caulk’s flexibility and waterproofing make it perfect for dynamic areas like corners and niches, while grout’s durability and aesthetic appeal shine between tiles.
By combining both, I created a shower that’s functional, beautiful, and built to last. You can achieve the same by assessing your shower’s needs, budget, and style. Pick quality materials, follow proper application techniques, and maintain them regularly.
Your bathroom deserves a solution that keeps it looking great and performing flawlessly for years.