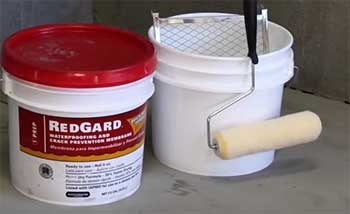
You should buy the RedGard liquid membrane if you are looking for a budget-friendly, paint-on solution for odd shapes, but you should choose the Schluter Kerdi system if you want a guaranteed uniform thickness and a faster transition to tiling.
I have found that for many of you, the choice comes down to whether you prefer a physical orange fabric or a chemical red liquid.
In this article, I will explain why your specific shower layout and your patience for drying times should dictate which of these waterproofing giants you pick for your 2026 renovation.
Comparison Overview: RedGard Vs. Schluter Kerdi
| Feature | Custom RedGard | Schluter Kerdi System |
| Product Type | Liquid-Applied Membrane | Sheet-Applied Membrane |
| Material | Elastomeric Liquid Rubber | Polyethylene Fabric |
| Thickness Control | Manual (Requires multiple coats) | Factory-Guaranteed (Consistent) |
| Installation Method | Paint roller or Brush | Unmodified Thin-set Mortar |
| Waiting Period | 12-24 Hours (Curing) | Zero (Tile immediately) |
| Vapor Rating | High (Good for steam) | High (Standard for steam) |
| Price Point | Affordable / Low Entry Cost | Premium / Higher Total Cost |
| Complexity | Simple but messy | Technical but precise |
My Personal Experience with the Battle of the Membranes
I remember the first time I stood in a bare stud bay, staring at cement board and wondering if I should roll on a liquid or hang a fabric.
I am a person who likes to see immediate progress, so I initially reached for RedGard because it felt like painting a room.
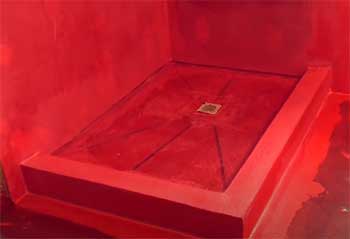
I noticed immediately that RedGard is incredibly satisfying to apply; watching that pink liquid turn into a dark, rubbery red makes you feel like you are building a fortress.
I found that for a simple guest shower with no benches or niches, the liquid was a breeze.
I realized, however, that when I started my master bath with a custom built-in seat and three recessed niches, the liquid became a bit of a nightmare.
I eventually tried the Schluter Kerdi system, and I noticed that the physical fabric was much easier to manage around those sharp 90-degree corners.
I found that instead of waiting hours for a liquid to dry in a damp corner, I could just thin-set the orange Kerdi sheet and move on with my life.
I am someone who values a schedule, and I noticed that with Schluter, I wasn’t constantly poking the wall to see if it was still tacky.
I eventually found myself in a situation where I had to repair a small leak in an old shower.
I noticed that RedGard is much easier for small patch jobs because you don’t have to worry about the “build-up” of overlapping fabric seams.
On the other hand, I realized that on a large, flat wall, the Schluter Kerdi sheet provides a level of confidence that a liquid just can’t match.
I found that no matter how good I am with a roller, I can’t guarantee that my RedGard is exactly 30 mils thick everywhere.
With Schluter, I noticed that the thickness is set at the factory, which removes the guesswork for me.
I finished my latest project realizing that both systems are phenomenal if you respect their limitations.
I eventually learned that RedGard is my go-to for “choppy” small spaces, while Schluter is my undisputed king for full-room wet areas.
I realized that if I were tiling a steam shower, I would feel equally safe with either, provided I followed the specific overlap rules for the sheet or the mil-thickness rules for the liquid.
I found that the peace of mind comes from the brand reputation, but the success comes from my own hands.
Maintenance Tips for a Waterproof Shower
- Conduct a 24-Hour Flood Test: You should realize that no matter which system you pick, a leak is possible. Plugging the drain and filling the pan with water is a vital maintenance tip for peace of mind, which I found catches 99% of installation errors before they become expensive disasters.
- Keep Your Corners Clean of Excess Mortar: You should notice that if you leave big lumps of thin-set behind the Kerdi fabric, your tile won’t sit flat. Wiping down your seams as you go is a key maintenance tip for a professional finish, which results in a much easier tiling process the next day.
- Apply Two Heavy Coats of RedGard: You should realize that the first coat often just primes the surface. Going back for a second “insurance” coat in the opposite direction is a smart maintenance tip for liquid users, which I found ensures that every microscopic pinhole is sealed tight.
- Overlap Kerdi Seams by Exactly Two Inches: You should notice that the waterproof integrity of the Schluter system depends on the overlap. Using the 2-inch Kerdi-Band at every junction is an essential maintenance tip for safety, which provides a continuous barrier that moisture simply cannot penetrate.
- Store Your Liquid Buckets Indoors: You should realize that RedGard can be ruined if it freezes in a cold garage. Keeping your chemicals in a temperature-controlled environment is a great maintenance tip for product shelf-life, which I found prevents the liquid from becoming “chunky” and unusable.
- Use the Correct Trowel Size for the Sheet: You should notice that a 1/8-inch square-notched trowel is the standard for embedding Kerdi. Using the wrong size is a crucial maintenance tip for adhesion, which results in either too much build-up or not enough bond to the wall.
Pros and Cons of RedGard: The DIY favorite
Pros of RedGard: The DIY favorite
- Seamless and Liquid Form: It features an elastomeric liquid that conforms to any shape: I found this perfect for round drains and hexagonal niches: this results in a continuous membrane without any physical seams to worry about: I noticed it fills the pores of the cement board beautifully.
- Dramatic Color Change Indicator: It utilizes a pink-to-red curing process that tells you exactly when it’s dry: I found this to be a foolproof way to ensure I wasn’t tiling over wet product: this provides a clear visual guide for a second coat: I noticed that thin spots stay pink longer, which is a great warning sign.
- Low Initial Investment: It features a lower price per gallon compared to the specialized tools and rolls needed for Schluter: I found it very accessible for budget-conscious homeowners: this results in a professional-grade waterproofing at a fraction of the cost: I noticed that most local hardware stores always have it in stock.
- Excellent Crack Isolation: It utilizes a flexible rubberized skin that can bridge minor non-structural cracks: I found that it protects my tile from the slight settling of the house: this provides a durable base that prevents grout lines from popping: I noticed it stays flexible even years after application.
- Easy Application with Household Tools: It features a consistency that works with a standard paint roller or brush: I found that I didn’t need to learn any new skills to apply it: this results in a very fast setup time for the waterproofing phase: I noticed that cleanup is relatively easy if you catch it while it’s wet.
Cons of RedGard: The downsides of the liquid life
- Manual Thickness Guesswork: because the product’s effectiveness depends entirely on how thick you apply it: I found it difficult to know if I had reached the required 30-mil thickness without a gauge: this results in a risk of water penetration if applied too thin: I noticed that many people make the mistake of only doing one light coat.
- Lengthy Curing Times: because the liquid must fully evaporate and cure before you can start tiling: I found that in humid weather, I was waiting over 12 hours between phases: this provides a significant bottleneck for weekend warriors: I noticed that if I rushed the tile, the bond was much weaker.
- Messy and Pungent Application: because the product has a strong ammonia-like scent and sticks to everything: I found that my clothes and tools were essentially ruined if I wasn’t careful: this results in a less pleasant working environment in small bathrooms: I noticed the fumes can be quite strong without a fan.
- Pinholes and Hidden Voids: because a liquid can leave tiny air bubbles or missed spots if not brushed in properly: I found that I had to do a “flood test” religiously to be safe: this results in extra work to check for leaks: I noticed that a single pinhole can cause a major failure behind the tile.
- Re-emulsification Risks: because the first coat can soften if you apply the second coat too aggressively while it is still “green”: I found that it can pull the membrane off the wall if you aren’t gentle: this provides a frustrating setback for new users: I noticed that temperature plays a huge role in how the layers bond.
Pros and Cons of Schluter Kerdi: The professional’s choice
Pros of Schluter Kerdi: The professional’s choice
- Guaranteed Uniform Thickness: It features a polyethylene sheet that is manufactured to the exact same thickness throughout the entire roll: I found that this removes all the “human error” from the waterproofing process: this results in a 100% reliable barrier: I noticed it feels much more substantial than a layer of paint.
- Zero Wait Time for Tiling: It utilizes a mechanical bond with unmodified thin-set that allows you to start tiling the very second the sheet is on the wall: I found this to be the biggest time-saver in my career: this provides the ability to finish a whole shower in one day: I noticed a huge boost in my productivity.
- Superior for Complex Geometry: It features a flexible fabric that can be cut, folded, and overlapped: I found it much more reliable for waterproofing corners and benches where liquids might pool or thin out: this results in a cleaner, more structural-looking installation: I noticed that the pre-formed corner pieces are a genius addition.
- Integrated System Approach: It utilizes a full ecosystem of drains, curbs, and trays that all work together: I found that using the whole system practically guarantees a leak-free result: this provides a warranty that is often much stronger than a “bucket only” warranty: I noticed that every part of the system is designed to lock together.
- No Fumes or Chemical Odors: It features a scent-free installation since you are working with mortar and fabric: I found this much more comfortable for working in finished homes: this results in no complaints from clients about chemical smells: I noticed I didn’t need a respirator at all.
Cons of Schluter Kerdi: The price of the orange sheet
- High Material and Tool Cost: because you have to pay for the roll, the specialized thin-set, and the proprietary drains: I found the total system cost to be nearly triple that of a bucket of RedGard: this results in a higher overall project budget: I noticed that the specialized trowels also add to the expense.
- Steep Learning Curve for Beginners: because the technique of “embedding” the fabric without air bubbles is a specific skill: I found that if I didn’t use the right trowel, the fabric would peel away: this provides a risk for first-timers who haven’t watched the training videos: I noticed that overlapping seams can create “bumps” if not done correctly.
- Potential for “Build-up” at Corners: because every time you overlap a piece of Kerdi-Band, the wall gets thicker: I found that this can make it difficult to keep your tile flat in the corners: this results in extra work for the tile setter to “feather out” the mortar: I noticed that triple-overlapping in corners requires a lot of finesse.
- Requirement for Specific Mortar Types: because Schluter strictly requires unmodified thin-set for the fabric-to-fabric bond: I found that many local stores only stock modified thin-set: this results in a hunting trip to find the right materials: I noticed that using the wrong mortar can void the entire warranty.
- Difficult to Retrofit: because it is a “system” that works best when used from the studs up: I found it much harder to use for small repairs in existing showers compared to a liquid: this provides a limitation for minor renovations: I noticed that it’s an “all or nothing” approach for most projects.
Comparison with Others
- RedGard Vs. Mapei AquaDefense
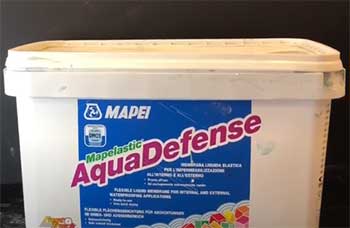
I found that AquaDefense is very similar to RedGard, but it dries much faster.
You should realize that AquaDefense is blue/green and doesn’t have the same dramatic color change that I noticed with RedGard.
I noticed that AquaDefense has a much lower odor, which I found to be a huge plus in small bathrooms.
I believe that AquaDefense is the better choice for you if you are in a rush, but RedGard is the better choice for you if you need a visual guide for coverage.
- Schluter Kerdi Vs. Laticrete Hydro Ban Board
I noticed that Hydro Ban Board is a waterproof foam board that doesn’t need a separate fabric or liquid.
I found that while the board is even faster than Kerdi, it is much more expensive per square foot.
You should realize that with Kerdi, you are adding the waterproof layer to existing drywall or cement board.
I believe that Kerdi is the analytical winner for those who want a proven system without the high cost of pre-waterproofed boards.
Also Read: Comparison Of RedGard Vs. Hydro Ban
Frequently Asked Questions (FAQs)
No, they are different brands (Mapei vs. Custom Building Products) with different drying times and odors, though they are both liquid membranes.
“Better” depends on your goal; for speed, Schluter Kerdi or Laticrete Hydro Ban are often considered superior by professional contractors.
Yes, when applied to the correct thickness (30 mils dry), it is an ANSI-approved waterproof and vapor-retardant barrier.
The most common mistake is applying liquid membranes too thin or failing to properly overlap fabric seams by the required two inches.
Final Thoughts
You should buy RedGard if you are a DIYer looking for a simple, cost-effective way to seal a standard shower with irregular shapes.
I have found that for most of you, the Schluter Kerdi system is the better choice if you want a professional-grade, speed-oriented result that removes the guesswork of thickness.
I believe that as long as you are meticulous with your prep and follow the manufacturer’s rules, your new shower will be a dry and happy place for decades.